CLICK HERE FOR BLOGGER TEMPLATES AND MYSPACE LAYOUTS »

Monday, September 7, 2009

Good for Your Heart, Makes You Fart


Remember the charming little song, “Beans, beans, they’re good for your heart. The more you eat, the more you fart.”? Well, what the song says is true, and that’s why it's still around and still funny.

I’ve recently come across a great source for dried chickpeas, hence the subject of beans, and so I’ve been cooking with a lot of chickpeas recently. The source, incidentally, is the bulk bin at PCC Edmonds and the reason these chickpeas are so great is that they plump up into fat, tender morsels when I soak and cook them. I wouldn’t be so impressed if I’d had the same experience with other dried chickpeas – usually they turn out smaller, and even after soaking and proper cooking the skin is still a little tough, and the inside can be mealy. This may happen with dried beans if they are old and past their prime, so either the bulk bins at PCC have a high turnover (which I don’t doubt, considering the locals’ dedication to PCC) or they’ve recently bought a particularly fresh batch of dried chickpeas.

A little about the nutritional value of chickpeas for those who want to know. For lots of great information about chickpeas, visit the World’s Healthiest Foods. Chickpeas, also called garbanzo beans, are a type of legume. Legumes are famously high in fiber, and it’s the fiber that is the cause of the gas-producing aspect of beans, but that’s a fair trade-off in my opinion. Fiber is, by definition, the indigestible carbohydrates in food, but these carbs are literally grist for the mill for the bacteria in the colon. The bacteria ferment the carbs and produce carbon dioxide and hydrogen as byproducts. There’s nothing harmful about this gas, though it can be uncomfortable for some people, or embarrassing in social situations.

Fermentation of fiber in the colon also produces short-chain fatty acids (SCFA). Besides fueling the cells that line the intestines, SCFAs help keep blood sugar levels stable and contribute to a healthy immune system. The fiber content is also the reason beans have a reputation for being heart-healthy. The soluble fiber in beans has the ability to soak up cholesterol and fatty acids and carry them out of the body, bypassing absorption.

Legumes are an inexpensive and plant-based source of protein, which is why they are a staple for vegetarians and are prominently featured in traditional foodways all over the world. Chickpeas in particular have been cultivated for about 9,000 years in southwest Asia. When I want to cut back on my grocery bill for the week, I make sure to plan a couple of meals based on legumes. Right now, I’ve got lentil soup in the fridge (from the recipe in the Moosewood cookbook), some cooked chickpeas waiting to become hummus, and leftovers of this Greek-style dish of roasted garbanzo beans, redolent of fennel and caramelized shallots.


Roasted Garbanzo Beans with Swiss Chard

Makes 6 servings

Ingredients

Garbanzo Beans:
1 3/4 cups dried garbanzo beans (equivalent to 12 ounces dried beans, or 5 1/2 cups cooked beans), soaked overnight in twice the volume of water
10 garlic cloves, peeled
2-4 large shallots, peeled and sliced
3 small bay leaves, preferably fresh
2 teaspoons fennel seeds
1/4 cup extra-virgin olive oil

Chard:
2 tablespoons extra-virgin olive oil
6 garlic cloves, peeled, crushed
3 small bay leaves, preferably fresh
2 shallots, sliced
2 bunches Swiss chard, center stems cut out and chopped, leaves coarsely torn
1/2 cup chicken broth

Optional: Lemon

Preparation

To cook chickpeas:
Discard soaking water. Place chickpeas in a pot with water (about three cups of water per cup of beans) and bring to a boil. Adding a couple of bay leaves at this point really infuses the beans with flavor. Lower the heat to a simmer, cover, and cook until tender, about one hour (may take longer depending on age of chickpeas). When chickpeas are done, salt water generously (the water should taste like seawater) and allow them to cool in salted water.


Garbanzo beans:
Preheat oven to 350 degrees F. Combine first five ingredients in 9 x 13-inch glass baking dish. Sprinkle with salt and pepper. Pour oil over and stir; cover dish with foil. Roast until garlic is tender, about 35-40 minutes. Remove foil, turn oven to 450 degrees F and cook for 5-10 minutes more, or until shallots and garlic become slightly brown and caramelized.

Chard:
Heat oil in large pot over medium-high heat. Add garlic, bay leaves, and shallots. Saute about 5 minutes, or until shallots are tender. Add chopped chard stems, sprinkle with a little salt, and sauté about 5 minutes. Add chard leaves to pot, sprinkle with salt to taste and cover. Cook until chard wilts and volume is reduced by half, about 2-3 minutes. Add broth. Cover and cook until chard is tender, stirring occasionally, about 10 minutes.

Discard bay leaves from garbanzo beans and chard. Add garbanzo beans to the chard mixture and toss over medium heat until warmed through, moistening with more oil or chicken broth if needed. Season with salt and pepper to taste and serve.

I always serve this over brown rice and sprinkled with fresh lemon juice. Next time I make it, I think I’ll try adding lemon zest to the chard. I'll have more chickpea recipes up soon, like Chickpea Leek Soup!


Adapted from a recipe by Michael Psilakis, Bon Appetit, January 2008

Friday, August 21, 2009

The Involuted Inflorescence of the Syconium


Breakfast this morning: homemade granola topped with homemade yogurt flavored with vanilla and maple syrup, and chopped fresh figs. The whole combination is tangy, sweet, crunchy and creamy. The popping of the fig seeds between my teeth is one of my favorite food textures.

Figs are an interesting food. My brother tried to freak me out many years ago as I was eating a fresh fig by telling me that wasps lay their eggs in figs. I did not freak out, I’m proud to say, but filed the information away for later research. Many years later, I’m finally getting around to looking it up. This task is a heck of a lot easier with the Internet. And yes, it’s true… there’s a type of wasp called a fig wasp that is believed to have coevolved with the fig species so that the fig and the wasp cannot reproduce without each other! Amazing. More about this in a minute.

The so-called fig fruit is not actually a fruit. It’s a syconium, defined as a fleshy stem containing multiple flowers. Furthermore, the syconium is an involuted inflorescence, an inside-out cluster of flowers. Cut open the fig and the lines you see extending from the outer edge to the inside are the flowers, each with a seed at the end. Again, amazing.

As I was saying, several species of small wasps are intimately involved with figs. The wasps pollinate the figs by crawling into them through the ostiole, the small hole at the base of the fig, and laying their eggs inside. The species of wasp is specific to the species of fig and therefore a specific region, so that you can’t just grow any old fig in your yard and expect it to bear viable fruit. You have to have the right kind of wasp living nearby.

Funny, I don’t think I’ve ever found wasp larvae in my figs. Could it be that I just wouldn’t know them if I saw them or tasted them? I found this explanation on Wikipedia: “In figs of this sort [the sort that wasps pollinate], the crunchy bits in the fruit contain both seeds and wasps. However, there are several commercial and ornamental varieties of fig that are self-fertile and do not require pollination; these varieties are not visited by fig wasps.” I take that to mean that the types of figs sold as food are generally from self-pollinating species and I don’t have to worry about finding wasp eggs in them. Good to know.


As for their nutritional value, figs are a good source of fiber, potassium and manganese. According to the World’s Healthiest Foods, they’re also a fruit source of calcium, though you’d have to eat a lot of figs (about 8 medium figs) to get only 79 mg of calcium. Still, the more of these nutrients you get from your food, the less you need to get from supplements. And there are countless other nutrients supplied by whole plant foods, some of which haven’t even been discovered yet, let alone studied for their biochemical roles, that are believed to act synergistically with vitamins and minerals to help increase their absorption and facilitate their functioning in our bodies.

Figs are in season in the Pacific Northwest from July to September. This means you only have another month to get a hold of some wasp-free figs from your local farmers market. Enjoy them on salads, grilled and served with fish or pork, stewed along with your morning oatmeal, or just cut in half and smeared with a little goat cheese. Yes, I’ll say it one more time… amazing!

Monday, August 10, 2009

The Goods on Cocoa Nibs


My stats software tells me that there are a number of people out there looking for information on cocoa nibs. Given the name of this blog, I guess it behooves me to devote a little time to the subject.

First, why did I choose Cocoa Nibs as the title of my blog? Chocolate is one of my favorite foods. I am prepared to admit that I am obsessed with chocolate. I eat it every day of my life. And its ability to stimulate and satisfy in small amounts made it the perfect symbol for what I hoped to achieve with my blog.

Cocoa nibs -- or cacao nibs -- are bits of roasted cocoa beans. They're the whole foods version of chocolate! They have not been sweetened or otherwise processed, so they’re bitter and a little grainy, a little crunchy. Cocoa nibs are often used these days as accents for salads and baked goods, but most cocoa nibs go on to become chocolate liquor (cocoa nibs ground into a paste), which is then made into chocolate by adding cocoa butter, sugar, and sometimes vanilla and lecithin. Cocoa nibs can also be separated into cocoa butter and cocoa powder.

As for the nutritional content and benefits thereof, cocoa is very high in antioxidants. Research at Cornell University showed that cocoa powder has more antioxidants than red wine and green tea. Flavonoids are one type of antioxidant that is especially abundant in chocolate. Flavonoids have some nice effects on the heart and the circulatory system, including the ability to improve the flexibility of the walls of the blood vessels, and anti-clotting effects in the blood.

Chocolate also contains stearic acid, a saturated fat that has been shown to be “cholesterol-neutral,” meaning that it neither lowers HDL levels (this is the good cholesterol) in the blood, nor does it raise LDL (the bad cholesterol) or total cholesterol levels.

Antioxidants, flavonoids, and stearic acid are highest in the darkest chocolate. Adding milk to chocolate not only dilutes the amount of beneficial compounds, it adds saturated fat and cholesterol that does affect blood levels. Most chocolate manufacturers are now putting the chocolate percentage on product labels, making it easier to identify and buy the chocolate with the most added benefits.

I agree with Dr. Weil’s advice to eat one ounce of dark chocolate (he recommends at least 70%) several times a week. And remember that though chocolate may be good for you, overindulging in it can lead to weight gain, just like anything else!

As for cocoa nibs, they have all the great benefits of chocolate without the added fat and sugar, and the additional processing. There are many recipes floating around on the Internet, so cruise around a little and find one that strikes your fancy. Here are some to get you started:

Chocolate and Cacao Nib Cookies
Cacao Nib Almond Sticks
Ribeye Steaks with Cocoa Nibs Spice Rub

Sunday, August 2, 2009

Au Naturel


We have a three-foot wide strip of earth at the edge of our patio, just like each ground-level apartment in our complex. Some of our neighbors have been ambitious and have planted flowering plants in these tiny patio gardens, others are attempting to grow vegetables, bless their green thumbs, in pots set on top of the soil, and some have just let the gardening crew keep it raked clean of any plant life at all.

We chose the third option for the first six months of our residency here, but soon noticed that between the gardening crew’s visits little bits of plant life would appear, mostly dense patches of moss since we don’t get much direct sun on this side of the building. Did you know that moss comes in about twenty shades of green?

It was my husband’s idea to ask the landscapers to leave our plot of ground alone and let nature take over. The moss quickly spread to every corner of the garden, despite a close call when one un-informed worker took his rake to the moss just when it was really taking hold.


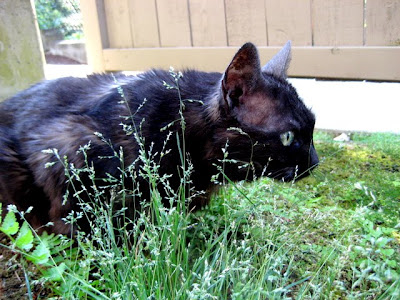
The ferns and the grasses have recently arrived. Now our garden looks like the forest floor – moist dark soil teeming with bug life, plants randomly and beautifully arranged. Our cat peruses the menu of grasses for her afternoon snack, and the dog… well, she’s content just to gaze upon the garden from the sun-warmed concrete.


The beauty of this random garden causes me to wonder how many other things in our lives would benefit from being left alone, or au naturel, a French term meaning “in a natural state.”

My mind turns automatically to food – that is my profession and my passion, after all. I love making elaborate dishes with complex flavors that take hours to prepare, but just this afternoon I had a salad for lunch that was just greens, cucumber, tomato, red pepper and avocado. It was utterly satisfying. I remember not too long ago savoring a raw, unsalted almond. If you’re paying attention, complex flavors can be found in the simplest of foods.

The summer is a good time to go au naturel with food because fresh fruits and vegetables are abundant. It’s an exercise in developing the senses since foods that haven’t been salted, spiced or sugared have more subtle flavors. Plus, the closer you are to the natural form of the food the closer you are to a whole foods diet, and that’s good for all of us.

The itsy bitsy flower at the bottom right measures about 3mm.

Saturday, July 25, 2009

Applied Nutrition: Homemade Dog Food


I think it’s time for an update on my development of a homemade dog food that satisfies both my inner nutritionist and my dog. Between my first post about dog food and now, I have tried a new recipe but it didn’t quite take with Maxie or with me. It was a little too labor intensive and I don’t think the raw veggies sat well in Maxie’s system. I returned to the diarrhea diet but continued to worry that she was getting too much carbohydrate from the sweet potato and russet potato in the recipe.

I finally consulted a holistic vet in the area who gave me a handout copied from The Whole Dog Journal called “Now We’re Cooking!” on preparing a cooked diet for pets. The vet also made some recommendations for altering my recipe to make it more suitable for everyday doggie dining.

The first thing I did was to add more protein, and cut back on the amount of sweet potato and potato. According to the handout at least half but preferably more of the diet should come from animal sources. I bumped up the amount of chicken in the recipe and added organ meats like chicken livers and hearts.

Then, to help bulk up the food a little without adding more starch or meat, I added chopped Swiss chard. I don’t want to use grains yet because I think Maxie is sensitive to grains, and because I’m seeing more and more recommendations to avoid or limit grains in pet food.

I am still putting a little bit of kibble (Spot’s Stew is my favorite) in the bottom of the bowl to provide some extra vitamins and minerals because I haven’t invested in a doggie multivitamin yet, or explored the different ways to supplement homemade food. I am convinced that there is a way to make homemade food without having to supplement, but I’m not sure that I’ve hit that perfect recipe yet.

However, I am supplementing with canned sardines that have no added salt, a large spoonful after each meal. She’s also getting about a tablespoon of homemade yogurt (made with whole raw milk) after every meal. The sardines are providing omega-3’s and calcium because they contain bones, and the yogurt is giving her more calcium and probiotics. I think she’s also getting calcium from the chicken because my recipe starts with chicken thighs on the bone and they stew for a good hour to an hour-and-a-half, long enough to leach some of the minerals from the bone. I also let it cool on the stovetop for a bit before pulling the thighs out for deboning and chopping, and this seems to pull more of the collagen out of the bones.

By the way, Maxie’s getting about 1 1/4 cups of this mixture over about 1/4 to 1/2 cup of kibble twice a day. She weighs about 33 pounds. As you can see from these photos of Maxie, she is maintaining her girlish figure and glossy coat while eating this food (her poops are looking good, too, but I'm not going to show you those).

Next steps: I’m planning to change up the chard for something else in the next batch, maybe some broccoli and squash, and would also like to try using beef or pork soon. I may also start breaking an egg over her dinner once or twice a week.

In the meantime, here’s my current recipe:

3 pounds chicken thighs (with bones)
3/4 pound russet potatoes, diced
1 1/4 pounds sweet potatoes, diced
4 cups water
1/2 pound chicken livers or hearts, or a mixture
1 bunch Swiss chard, chopped

Put chicken, potatoes and sweet potatoes in a stockpot and add water.* Bring gently to a simmer (do not boil) and cook uncovered for about 1 hour and up to 1 1/2 hours. With 15 minutes left to cook, add organ meats and chard and cook for an additional 15 minutes.

Remove from heat and allow to cool for about 30 minutes, then pull out chicken thighs. Once chicken is cool enough to handle, remove meat from bones. Try to pull the cartilage off the ends of the bones, too, as this is a good source of collagen. Chop chicken into smaller pieces. Add chicken back to the stew and mix well.

Transfer stew to containers for storage. This stew will stay fresh in the refrigerator for 3-5 days, but I recommend packing it into containers that will hold about 3 days worth and putting the rest in the freezer.

* Resist adding more water, or you’ll end up with a very soupy dogfood. With this amount of water, not everything will be covered at first, but the veggies and chicken will start to break down after a little while and release some juices and as long as you stir it all up a couple of times within the first 15-20 minutes everything will eventually end up submerged and well-cooked.

Wednesday, July 15, 2009

Nostalgia Smacks Me Upside the Head


I had a heavy encounter with nostalgia this afternoon. I was cleaning out my closet to make room for things I don’t use but that I’m not willing to give up yet, and I found a huge box labeled “PHOTO ALBUMS.” Knowing that opening the box would be a guaranteed time suck, I was just going to move it to the back corner of the closet when one of the flaps rasped open.

I had to take a quick peek inside. One thick gold-embossed album stood on its spine between two others, so that its pages were slightly fanned and I could just barely see the edges of the photos. I know my old photographs so well that I immediately recognized one of my favorite pictures just from seeing its edge. A friend and I are taking a picture of ourselves by holding the camera at arm’s length and putting our heads close together. We are laughing so hard that the photo is mostly teeth, lips and nostrils.

Naturally, I had to pull the album out, sit on the bed, and browse through my past. I marveled at how thin I was, how big and white my smile was, how young my skin looked, and then I had to laugh at the requisite heavy makeup and the ridiculous things I did with my hair (hey, it was the 80’s!).

Looking at this younger version of myself, I regretted having “let myself go” in the years since. (That phrase is so funny, as if I’d put my young self on a train and waved goodbye as she pulled out of the station. Of course the changes were more gradual than that.) I’m not the first to comment on how youth is wasted on the young, but it sure feels personal when I look at pictures of myself at age 20! What a twist it is on that theme for a nutritionist that when I looked my best, my diet was the worst (just like every college kid).

This summer I’m working as an assistant for kids’ cooking classes. These kids know so much more about food and cooking than I did at their age. They know what “whole foods” are, they know the difference between dried basil and oregano. They even love seaweed! They’re being raised in the same decade in which consciousness is being raised about the role of food in our health, from its impact on our bodies to the impact the food industry has on the environment and the sustainability and safety of our food supply.

Oh, this gives me hope. Hope that it won’t take the kids of this generation as much time as it took me to realize the importance of eating well. Hope that to them it will be second nature to account for the environmental costs of their food as well as the amount they pay at the store (or the farmers market). Hope that they’ll take such good care of themselves from a young age that when they get to midlife they’ll look back at their college photos and think, “I still look good!”

Monday, July 6, 2009

Herbally Yours


I first heard about herbal infusions and nettles in a class at Bastyr University called Therapeutic Whole Foods, taught by Jennifer Adler. During class, she drank regularly from a large Mason jar filled with a deep green liquid. After explaining to us that what she was drinking was an infusion of stinging nettles, she said something like, “Since I’m drinking water all day long I figure I might as well make it count.”

Wild plants are generally significantly higher in nutrients than domesticated plants. Nettles (Urtica dioica) in particular are high in iron, calcium, and magnesium, as well as a number of trace minerals and vitamins. They’re also about 10% protein, according to Susun Weed, an expert in herbal medicines. I’ve used freeze-dried nettles in capsules to successfully stop allergy attacks and to still my restless legs, so I knew they were potent and was intrigued by what they could do in an infusion.

In another class, we learned that nettles are one of the whole foods sources of compounds that have anti-inflammatory properties. Turmeric is another. I promise to talk about inflammation in another post, but for now just know that nettles are anti-inflammatory – a beneficial thing for most Americans, who generally eat highly inflammatory diets and suffer from a number of diseases that have been linked to excessive inflammation in the body.

A few weeks after that first class, Jennifer had us taste an infusion of oatstraw (Avena sativa) and then talk about any effects we felt. Most people said they felt a calming effect almost instantly.

I started off my fall quarter that year with a daily regimen of 2-3 cups of an infusion made with both nettles and oatstraw, as well as an additional herb for flavor, such as lemon verbena or lemon balm. These other herbs have properties of their own, of course, but an expert herbalist reassured me that they were safe to use together in my infusions.

Jennifer’s recommendation to the class was to start with an infusion made with only one herb, known as a “simple,” in order to get a sense of the effect of that particular herb before trying another one. Though I didn’t follow that recommendation, I think it’s valid and worth doing.

Recently, I’ve been using rooibos to flavor my infusions and it's my favorite combination so far. Rooibos is an ancient herb that's become trendy in the U.S. as a substitute for coffee or black tea. It contains some antioxidants and has been used medicinally in South Africa for hay fever, asthma, eczema and heartburn. I find that the rooibos adds a slight anise flavor to the infusion and lends its red color to the liquid (as pictured below).


Now, before I tell you about the effects this preparation had on me, I want to emphasize that these effects are not necessarily reproducible. There are lots of factors in how we each react to different nutrients and plant compounds, including when and where the plant was grown and our body’s individual ability to metabolize these compounds.

I also need to voice the important disclaimer that I am NOT an expert in medicinal herbs. Before you make your own infusions, please find a reputable source of information on herbalism. Most vendors for medicinal herbs have a trained herbalist on staff who can answer your questions.

As for my personal experience with these infusions, it was very positive. Having experienced a summer-long bout of insomnia, I was excited to find within two or three days that I was again sleeping through the night. This effect has continued, along with a general increase in energy and a very welcome decrease in stress. However, I've found that if I drink the tea past early afternoon, I don’t sleep as well.

Nine months later, I’m noticing longer-term effects. Though my allergies haven't disappeared, this is the first spring in six years in which my eyes were not constantly itchy, hot and overly sensitive to light. There had been times over these past few years when I had to wear sunglasses indoors at night to function! An end to that discomfort is a very welcome thing. My ND agreed that this improvement in my allergies is likely due to the anti-inflammatory and antihistamine properties of nettles.

How to make a cold herbal infusion:


Nettles, oatstraw, and lots of other herbs and medicinal plants are available through companies like Dandelion Botanical in Seattle. Find a source close to you geographically to keep shipping and environmental costs low and to ensure that at least some of the herbs come from your more immediate environment. And speaking of cost, these herbs are generally inexpensive, about $1 to $2 an ounce. Four ounces of each will get me through a few weeks of nourishing infusions.

I do a cold infusion, meaning that I steep the herbs overnight in cold water rather than pouring boiling water over them and allowing them to sit, which is the usual method. I learned last summer from a reputable source (at the time, she was the chair of the Department of Botanical Medicine at Bastyr – here she is talking about the science behind some folk remedies) that a cold infusion has two advantages over a hot one. First, fewer of the tannins in the plant are released. Tannins are the compounds that lend bitterness to plants and make your mouth pucker. Second, more of the minerals are released from the plant with a cold infusion.

Added 8/16/09: Since writing this post, I've learned from a friend who is in the process of taking a course in herbal medicine-making at Bastyr that the tannins that are released with a hot infusion bind the minerals that are released, making them less available to us when we drink the infusion. So while the cold infusion does not necessarily release more minerals, fewer are available for absorption.

To make the infusion, I put about a quarter cup each of the dried nettles and oatstraw into a wide-mouth glass jar, with a little less than a quarter cup of whatever herb I’m using for flavor (or about one tablespoon of rooibos). Then I pour cold water over the herbs, put the lid on the jar, shake it gently to make sure all the herbs get wet, and let it sit overnight for about 8 hours.

The next morning I strain it through a fine-mesh strainer, put the strained tea back into the jar and drink it throughout the morning. You can also double or triple the recipe and keep it in the fridge for 3-5 days.

Making an herbal infusion is an easy and cost-effective way to add flavor and nutrients to your drinking water. Here are a few resources for initiating your own study of the wonderful healing properties of herbs:

Susun Weed Warning: Susun Weed is quite eccentric. She is also a renowned expert on herbalism and provides good advice about using herbs.

Rosemary Gladstar: Another renowned herbalist with a number of books on herbs and their uses.